


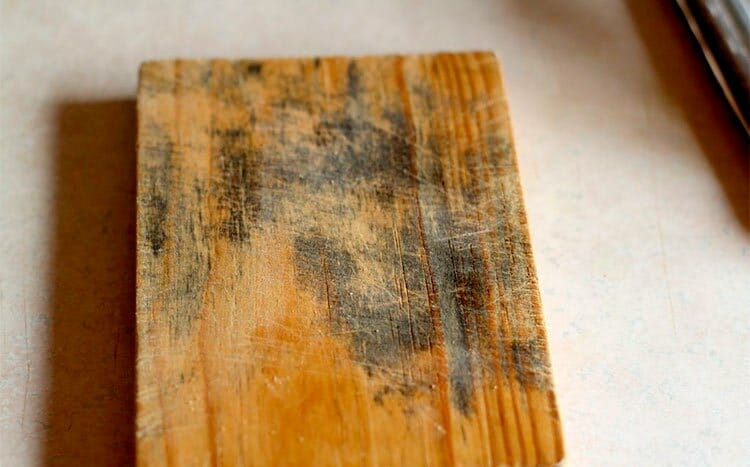
Wood is not just proficient in absorbing moisture; it also significantly retains it. Hence, without the application of paint or lacquer, it frequently becomes a perfect breeding ground for mold.
Before the step-by-step on how to kill mold, you need to identify a few hidden places, so you can kill it all. We also outline the safety equipment you need to wear.
What we cover
ToggleCommon areas mold is found on wood
Given how easy it is for mold to develop on unsealed wood surfaces, it is always good to be aware of where these surfaces are located. Doing so will make it easier to keep your home mold-free as you can always check these surfaces routinely to make sure that they aren’t breeding grounds for mold.
Common areas mold is found on wood, and which you should check regularly, include:
- Hardwood floors
- Behind furniture
- Window frames
- Ceiling
- Under floorboards
- Outdoor decking

Materials and safety PPE before you start
Before you embark on a mold-clearing campaign, you need to get your tools in order. This includes going shopping, or renting, products that you will need. It also involves acquiring and putting on safety gear that will protect you and your loved ones from mold spores.
Safety gear
The safety gear that you will need to wear includes:
- A pair of rubber gloves to protect your hands from the corrosive chemicals that you will be using. The gloves also keep mold spores from sticking to your hands.
- Goggles to protect your eyes from the irritation that dust and mold spores usually cause.
- A respirator or a face mask to shield your respiratory system from the allergenic effect of mold spores and dust.
- Old long-sleeved clothing that you can wear and dispose of to ensure that you don’t end up accidentally spreading mold spores throughout your home.
- Protective outer clothing that will protect your actual clothes from discoloration or staining in case of accidental spills of cleaning chemicals like bleach.
Materials
The following are the materials that you will need in order to effectively get rid of mold from a wood surface:
- A stiff-bristled brush
- A spray bottle
- A scrubbing sponge
- Plastic sheeting
- Plastic bag
- Dry towel
- An old box fan and or dehumidifier
- A cleaning solution. This can be chlorine bleach, vinegar, or baking soda, It can also be a specialized chemical with antifungal properties and which has been designed to kill off mold in homes.
- A vacuum with HEPA filters
Steps to remove mold from wood
With your tools and materials ready, it is now time to swing into action. Here are the steps that you will take if you want to effectively remove mold from a wooden surface.
Step 1: Seal off the work area
Once mold spores get airborne, they tend to spread easily throughout a home. Therefore, the first step in the mold removal process should be containment.
Start by closing any doors that lead up to the rest of your house. And if your air conditioning system is running, turn it off. After you are done, use the masking tape plastic sheetings on the doors and any other openings in order to create an air-tight seal. You should also do the same for air duct covers.
As for windows, you should leave them open. Opening them will improve airflow within your work area, and this will reduce the amount of mold that ends up settling on surfaces within the area. If you have a box fan, you can use it to improve air circulation within the area.
Step 2: Moistening
When you are scraping mold off the wood surface, you don’t want to release spores into the air. Therefore, spritzing the mold surfaces with water can help. All you have to do is to fill the spray bottle with water and then spray the moldy surface with a few droplets of moisture.
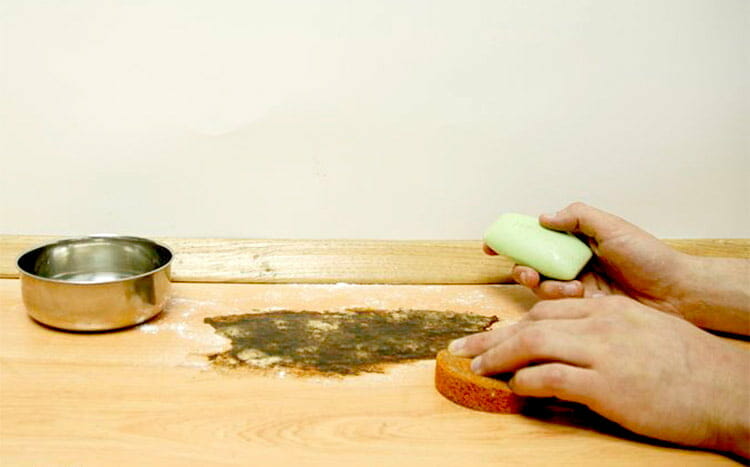
Step 3: Scraping mold and debris
The next step is to simply scrape visible mold off the wood. A hard-bristled brush is usually good enough to get the job done. If you have a putty knife, you can use it to loosen large chunks of mold and debris.
After you are done, collect the resulting dust, mold, and debris and place it in a plastic bag. Seal the plastic bag and then dump it in a trash bag.
Step 4: Vacuuming
For this stage, you will need a vacuum that has HEPA filters. This is because using any other vacuum will only end up spreading mold spores throughout the room. This will not be the case for ones that have HEPA filters since the filters are usually effective enough to trap the spores.
Simply vacuum the surface. And when you are done, remove the vacuum bag and then throw it in the trash bag. You may thereafter have to change the filters.
Step 5: Preparing the solution
Mold-killing chemicals
If you intend on using specialized mold cleaning chemicals, all you will need to do is to follow the steps outlined by the manufacturers. And in such a case, you must always resist the temptation to mix different solutions, unless it has been explicitly recommended by the manufacturer. This is because some chemicals react with each other, and when they do, they produce poisonous gasses.
Bleach and detergent solution
Chlorine bleach is incredibly effective at killing mold, and so it can be used to remove mold from wood. If you opt to use it, you should start by first mixing half a cup with bleach with one quart of water. Thereafter, add a small amount of detergent, and your solution will be ready.
This is an effective combination because the bleach will kill the mold effectively. As for the detergent, it will make it easier for the solution to penetrate the wood, while also lifting up both the dirt and the mold. This makes cleaning easier.
Vinegar and baking soda solutions
Both white vinegar and baking soda kill mold effectively. Therefore, if you are looking for a natural and effective way of getting rid of mold from wood, they are a perfect solution.
To prepare a baking soda solution, take one spoon of baking soda and then dissolve it in warm water. As for vinegar, mixing it in equal parts of vinegar and water will work. Some owners even choose to use undiluted white vinegar.
Step 6: Applying the solution
With the surface clear of any dirt, debris, or visible mold, it is now time to apply the mold-killing solution. Placing the solution in a spray bottle and then soaking the affected area is the easiest and most effective way to do this.
Use the hard bristled brush to scrub the surface as you are spraying the solution. And when you are done, let it sit. Give the solution time to work. An hour is usually enough, although some people prefer leaving it overnight.
Thereafter, simply use the dry towel to wipe off any remaining solution. Don’t rinse the wood with water, as this will increase the chances of reinfestation.
After you are done, simply let the wood dry out. If you can take it outside, you should do so and leave it in direct sunlight. If you can’t, then opening your windows, running a fan, and switching on your dehumidifier can help to speed up the drying process.
Step 7: Sanding
Sometimes, scrubbing is not enough to get rid of the ugly marks that mold leaves behind. There are also cases where the mold growth permeates too deep to such an extent that soaking the wood surface is not enough.
In such cases, sanding usually helps. Simply use sanding paper to sand the affected area. This should be enough to erode the affected layers, something that will then restore your wood’s looks. And if it is a matter of the mold penetrating that deep into the wood, then you may have to reapply the solution and repeat the process.
Step 8: Sealing
As pointed out above, wood has a propensity for absorbing and retaining moisture. This makes it vulnerable to mold attacks.
The only way to protect the wood from developing mold is to give it a protective layer. Oil-based primers and pigmented shellac are great options. You can also choose to paint the wood surface.
How to clean mold from wooden decking
To effectively clean wooden decking, start by using a hose to get rid of any dirt and debris that may be on its surface. Hosing the deck will also make it easier for the resulting solution to get absorbed into the wood.
With the wooden decking free of any dirt or debris, create a solution of powdered bleach, water, and a liquid detergent. Use this solution to pressure wash the deck. Let it sit for a while and then rinse it.
Finding a professional mold remediator
If you need help dealing with mold in your home, then the most convenient solution will be to use HomeGardenGuides.com. It offers a free service that quickly matches you with the top-voted local Mold Remediation Specialists.
Using the website, you can get 3 estimates fast by real certified experts in your area in just 2 minutes. Here is how it works.
- You scroll to the top of the page and enter your Zip code.
- Answer questions about your mold job
- Your mold and mildew details will be forwarded to three local experts.
- You will receive a price estimate for the job and some friendly advice.
IMPORTANT: There is no obligation to hire. This is a free tool and service to be used at your pleasure.

How to stop mold returning to wood
There are 3 main ways of stopping mold from returning to wood.
The first is to control humidity inside your home. This works because wood tends to absorb moisture from the environment. Reducing humidity will therefore reduce the odds of the wood absorbing enough moisture to lead to mold growth.
To achieve this, you will have to use dehumidifiers. A good air conditioning system can also help. And so can improving aeration in your home by opening windows and doors.
The second method of keeping mold at bay is to kill any mold that exists on the wood surface. As a result, using bleach, vinegar, baking soda, and other antifungal solutions during the cleaning process will reduce the chances of the mold regrowing.
The third way is to simply coat the wood. This can be done by repainting it. Sealing it with oil-based primers will also work.
Pro mold removal Vs. DIY
It is possible to undertake mold removal as a DIY project if the area that you are working on is less than 10 square feet. However, if the area is larger, it is always advisable that you seek the services of professional mold removal contractors. This is because larger areas tend to be more challenging and so effectively ridding them of mold usually requires extensive skill, experience, and manpower.
When compared to DIY, professional mold removal is faster. It also tends to be more thorough mainly thanks to the fact that Pro removers tend to have vast experience and appropriate training.
However, when it comes to cost, DIY removal is usually more attractive. This is mainly so especially in cases where one chooses to use natural solutions like vinegar and baking soda. Bleach is another DIY mold removal alternative that is also very affordable.
As a result, while the cost of hiring a professional mold removal contractor to be between $10 to 25$ per square foot, the cost of doing it on your own tends to be way less. This is so especially when you consider that you won’t be paying for labor costs.
Professional Mold Removal Costs | DIY Mold Removal Costs |
||
|---|---|---|---|
| The average cost per square foot | $18 | Wet vacuum rental | $30 per day |
| Average range per square foot | $10-$25 | Materials costs | $100 |
| Average remediation costs | $2200 | Safety equipment costs | $20 - $150 |
| Minimum mold removal costs | $375 | ||
| Maximum mold removal costs | $7000 | ||
FAQ's
Mold under hardwood floors
To effectively get rid of mold on a hardwood floor, create a solution of vinegar, baking soda, and water. Fill a spray bottle with this solution and then spray it onto the moldy section of your floor. You may have to scrub the floor with a stiff brush if the mold has created stubborn stains.
Wipe off any excess solution from the surface with paper towels, and thereafter, let it dry. After it dries, simply vacuum the floor with a vacuum that has HEPA filters. Your floor will now be mold-free.
What causes mold on wood?
Mold on wood is caused by the wood absorbing moisture. Later on, when free-roaming airborne spores land on the wood, mold grows because the combination of wood and a moist environment creates the perfect growing conditions.
Wood ends up absorbing moisture in situations where there is high humidity. Flooding, roof leaks, broken plumbing pipes, and even leaks from air conditioning systems can expose the wood to moisture. As a result, these tend to be common causes of mold growth on wood.
Can mold on wood make you sick?
Yes, mold on wood can make you sick. This is because the mold can release spores into your home.
The spores can then trigger extreme allergic reactions like eye irritation and a running nose. They can also worsen asthma conditions. And in cases where toxic species of mold grow on the wood, you can end up with serious respiratory complications.
Does moldy wood need replacing?
No, moldy wood doesn’t always need replacing. This is because the mold can be killed off, something that makes it possible to restore the wood. Replacing the wood is only necessary in cases where the mold growth is so extensive that it compromises the integrity of the wood.
Cases, where the aesthetic appeal of the wood is important, may also necessitate the replacement of the wood if the mold growth causes extreme discoloration. However, even in such cases, sanding the wood can sometimes restore the wood’s aesthetic appeal.
What kills mold on wood?
Bleach, baking soda, vinegar, borax, and other antifungal solutions are effective at killing mold on wood. However, when deciding which solution to use, you should always consider its effect on wood. For example, using chlorine bleach is usually discouraged because it normally damages wood. Oxygen bleach is instead preferred when it comes to ridding wooden surfaces of mold.
As a homeowner, it is way more economical to prevent mold growth on wooden surfaces than having to deal with the after-effects of mold growth. Therefore, taking steps to ensure that wooden fixtures are sealed and shielded from moisture exposure is always advisable.