


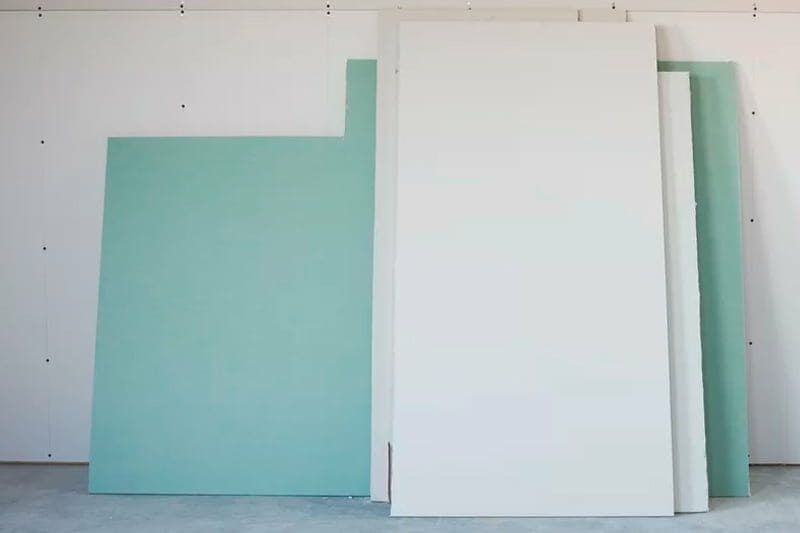
Drywall is an essential component in building walls and ceilings, particularly in kitchens. Opting for drywall resistant to moisture, mold, and fire significantly enhances the kitchen’s functionality and safety. This piece delves into the economic effects of incorporating drywall in kitchen constructions, provides a detailed cost analysis for different levels of drywall finishing, and identifies the optimal drywall options for kitchens.
The total cost to hang and finish drywall for a mid-size kitchen (225 square feet) ranges from $393.75 to $787.50. The national average cost to drywall a kitchen is $590.62, inclusive of labor and drywall materials. Your drywall installation cost depends on your kitchen size, drywall type, and finish level.
Several drywall contractors generally prefer to charge per square foot to install drywall, while some prefer to bill hourly rates for labor.
What we cover
ToggleAverage cost to install drywall in a kitchen
| Size | Low | High | |
|---|---|---|---|
| Small | 70 - 100 square foot | $122.5 | $350 |
| Medium | 175 - 225 square foot | $306.25 | $787.5 |
| Large | 440 - 750 square foot | $770 | $2,625 |
Drywall contractors charge around $1.75 -$3.50 per square foot to hang the drywall. The final cost can vary depending on the kitchen size, labor costs, and type of materials used. Kitchen size is the most critical cost factor because kitchens vary from 70 square feet for small kitchens to over 750 square feet for large kitchens. In other words, expect to pay a professional between $122.5 and $2,625 to install drywall in your kitchen.

Labor cost to drywall a kitchen
| Installation Stage | Cost per square foot | Small kitchens 75 - 100 sq. ft. | Mid. kitchens 175 - 225 sq. ft | Large kitchens 440 - 750 sq. ft |
|---|---|---|---|---|
| Drywall hanging | $0.15 - $0.60 | $11.50 - $60 | $26.25 - $135 | $66 - $450 |
| Drywall taping | $0.40 - $0.68 | $30 - $68 | $70 - $153 | $176 - $510 |
| Drywall priming | $0.10 - $0.49 | $7.5 - $49 | $17.50 - $110.25 | $44 - $367.50 |
| Drywall finishing | $0.35 - $0.62 | $26.25 - $62 | $61.25 - $139.50 | $154 - $465 |
| Total | $1.00 - $2.40 | $75.25 - $239 | $175 - $537.75 | $440 - $1,792.5 |
The labor costs for installing drywall in your kitchen often constitute a significant proportion of the total installation cost. They can range from $1 to $2.40 per square foot, depending on the kitchen size, job scope, and level of finish. Professional labor costs often start around $0.80 per square foot for new drywall installation. In contrast, the labor cost for a remodeling job that involves tearing down old drywall and hanging new material is considerably higher.
Cost to finish kitchen drywall per square foot
Now that your kitchen drywall is up, you might want to improve it for painting or the addition of decorative textures. There are six levels of drywall finishes ranging from 0 to 5. While the early levels are part of a standard drywall installation. The last few are optional. The table below indicates the cost of each drywall finish level for the small, mid-size, and large kitchens.
| Finishing Drywall Level | Level cost per square foot | Small kitchens 75 - 100 sq. ft. | Mid. kitchens 175 - 225 sq. ft | Large kitchens 440 - 750 sq. ft |
|---|---|---|---|---|
| Level 0 | $1 - $1.50 | $75 - $150 | $175 - $337.50 | $440 - $1,125 |
| Level 1 | $1.25 - $1.75 | $93.75 - $175 | $306.25 - $393.75 | $550 - $1312.5 |
| Level 2 | $1.50 - $2 | $112.5 - $200 | $262.50 - $450 | $660 - $1500 |
| Level 3 | $1.75 - $2.25 | $131.25 - $225 | $306.25 - $506.25 | $770 - $1,687.5 |
| Level 4 | $2 - $2.50 | $150 - $250 | $350 - $562.50 | $880 - $1,875 |
| Level 5 | $2.25 - $3 | $168.75 - $300 | $393.75 - $675 | $990 - $2,250 |
Level 0 Drywall Finish
It is the first stage of installation where the drywall is attached to the frames in the kitchen. But it is not taped, primed, or finished.
Level 1 Drywall Finish
During this stage, professionals add take and drywall mud to cover the seams. While this stage can be ideal for home interior areas like attics, it is unsuitable for kitchens. And another stage will be needed to make the drywall more presentable.
Level 2 Drywall Finish
At this stage, the drywall gets an application of the joint compound. However, sanding has not yet been done, and the drywall is still pretty much rough and unsuitable for kitchen use.
Level 3 Drywall Finish
This level is the primary finish for residential areas such as kitchens. In this configuration, the drywall has been sanded in preparation for priming and painting.
Level 4 Drywall Finish
By now, the drywall has undergone extensive sanding and smoothing to remove all rough marks and other surface imperfections. You can now add a coat of primer and flat paint.
Level 5 Drywall Finish
The highest drywall finish is achievable for your kitchen, or anywhere within your home for that matter. This configuration is the most suitable for glossy paints used in kitchens because the surface has undergone an extra round of sanding and smoothing to remove the tiniest surface indentations and imperfections.
How to calculate the cost of drywall boards for your kitchen
Drywall professionals estimate their costs by the square foot to quickly calculate the number of materials they will need for a particular project. For example, drywall is generally produced in 4 by 8 inch (32 square foot) or 4 by 12 inch (48 square foot) panels. Using standard metric measurements, they can rapidly estimate material and labor costs to provide quick quotes for customers. Below is a quick and straightforward way of calculating how many drywall pieces are needed to cover a kitchen.
- Measure sections of the wall surface of the kitchen to be covered by drywall and carefully record them.
- Add up the total square footage of the kitchen wall surface you have recorded.
- Divide the total square footage of the wall areas that need drywall by either 32 square feet or 48 square feet.
E.g., for an average kitchen (225 square feet): 225/32=7.03, or 7.5 boards of drywall.
You can easily estimate your drywall material costs after determining the number of pieces you will need.
Other cost factors
Other considerations can increase your overall costs. A few of these include:
Cost of other materials.
Materials like drywall tape and screws, nails, e.t.c, contribute to the project’s overall cost.
Time and work complexity.
Installing drywall inside an average-sized kitchen takes an average of two days. Larger kitchens requiring a textured surface can take three to five days, depending on the kitchen size and the scope of work involved.
Kitchen ceilings.
While many homeowners can perform a DIY installation of their kitchen drywall, the same can not be said of kitchen ceilings. A ceiling drywall project can get complicated if an existing ceiling needs to be removed. Hiring a professional to hang drywall on your kitchen ceiling is the best way to go. However, this will result in extra costs.
Replacing existing drywall.
The presence of asbestos and lead paint on older drywall can significantly increase your installation costs. For starters, the best course of action is to hire a professional to remove the hazardous material at the cost of between $500 to $700 from your kitchen. And if you want to tackle it yourself. Be prepared to spend extra on specialized safety gear, which includes respirators, goggles, and full-body suit, plastic sheeting to cover kitchen equipment and utensils, and a high-efficiency particulate air (HEPA) filter equipped vacuum cleaner to remove hazardous dust particles.
Unexpected repairs.
Unforeseen repairs can come up during the installation process. They can range from moisture damage to a load-bearing wall or deteriorated insulation that needs to be replaced. Serious repair issues such as the kitchen plumbing system or electrical wiring can cost hundreds of dollars to fix.
Permits and licensing
Another extra cost is the permit fee required by the building code in your area. Also, if you are hiring a contractor for the installation, then a licensed contractor will incur additional costs than a contractor who is not licensed to work in the state.
Type X Fireproof drywall
You will need to install fireproof drywall as per building standards near your cooktop and stove. Type x is more expensive than regular drywall, but it will not raise the cost of the entire job by more than $100.
Best drywall for kitchens and their cost
Kitchens are high-traffic areas of your home interior with high humidity levels. As a result, standard drywall is inappropriate for use in kitchens because they lack the required performance levels. The ideal drywall for kitchens is mold and moisture resistance drywall. Examples of these types of drywall include:
- Greenboard drywall (moisture resistant)
- Purple drywall (mold and moisture resistant)
Green board drywall
It is a common drywall type with a wax coating giving it excellent moisture-resistant qualities. It is one of the most common drywall types that you can find in almost every home. You can hang green board panels just like standard drywall. They are easy to cut, and local building codes in several areas require green board installation as tile backers in places with high moisture and humidity levels, including kitchens. Average prices start from $13 to $15 per sheet.
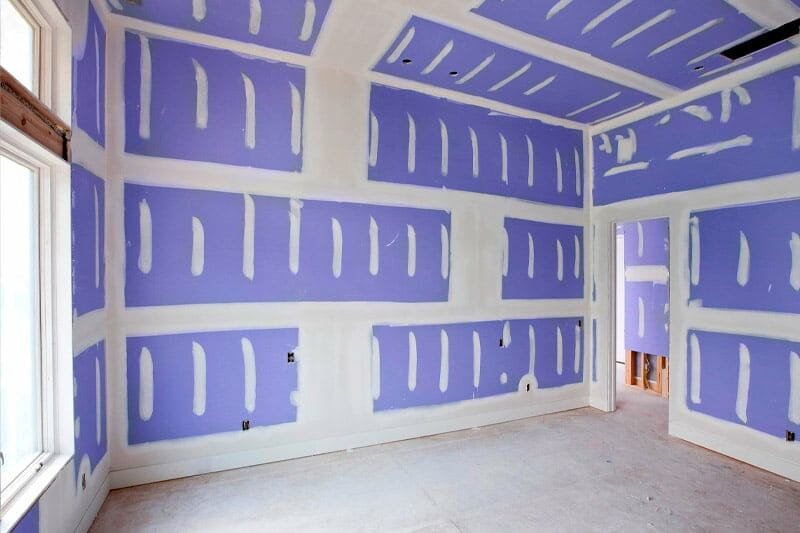
Purple drywall
Is a common name for moisture and mold-resistant drywall type. It performs the moisture-absorbing functions of green boards but also has excellent mold-resistant abilities. Purple drywall is ideal for use in kitchen backsplashes to prevent mold growth, thus avoiding the health hazards of mold build-up. Average prices start from $13 to $15 per sheet.
Should I prep kitchen drywall before painting?
Prepping new kitchen drywall for priming and painting is an important stage of the installation, depending on the finish level you need. Prepping drywall for primer and paint requires a higher finish level which costs considerably more than a basic finish level. Painting your kitchen with high-gloss paint without prepping the drywall will expose the seam lines and other surface imperfections. Using grit sandpaper is a standard DIY prepping method.
Here is how to prep your kitchen drywall before painting.
- Cover all nail holes, including props, with sparkle. Smooth en with a drywall knife and allow you dry.
- Apply spackle to all the cracks and seams and smoothen with a drywall knife to blend into the wall surface.
- Sand the surface with a sanding block, sponge, or sandpaper to smoothen out rough spots on the drywall.
- Dulling the surface during sanding helps the new paint adhere better to the drywall.
- Using a sponge, wash the drywall surface with a detergent solution. Rinse with clean water to remove any remaining cleaning agent.
- Wipe the wall with a damp cloth and allow it to dry thoroughly.
Professional drywall service vs. DIY cost
Kitchens can present complex problems when installing new or replacing existing drywall. Ensuring a tight fit without leaving gaps between the wall around cabinets, shelves, and burners requires the skills of an experienced drywall contractor. However, if you are looking to save costs (which can be pretty considerable) at the expense of quality. And you have a handy way with tools. Then a DIY approach is your best bet.
Professional installation
The considerable fees charged by professionals often turn off most homeowners, but it is always worth the investment. Whether you are putting up bare drywall for your kitchen wall or creating fancy textures to match your countertops. Hiring a drywall contractor does offer lots of benefits. Let us have a look at the pros and cons.
Pros
- Hiring a contractor guarantees a high-quality finish.
- Fast and timely job completion.
- Hiring a contractor allows you to select between a wide range of finishes and textures.
- It is less stressful, leaving you enough time to do essential assignments.
Cons
- It is more expensive, and average contractor fees make up about two-thirds of the total project costs.
- You will have to contend with strangers shuffling around your home.
- Contractors have significant control over how the project and your suggestions may elicit significant pushback.
- Your preferred contractor may not be available when you need him, resulting in project delays
DIY
Homeowners can install drywall in a kitchen as a cost-saving alternative. However, expensive mistakes can quickly erase whatever cost savings you intend to achieve. Installing drywall in your home kitchen might not be a good idea unless you have considerable DIY experience performing home improvement projects. Let us have a quick look at the pros and cons.
Pros
- It is cheaper than hiring a professional.
- You are free to make your design choices. You can change paint colors or textures on the fly without having to consult with anyone.
- You have scheduling freedom and the right to complete the project at your own pace.
- Your privacy is secure as no strangers are walking around your home during the construction process.
Cons
- DIY kitchen drywall installation takes up a significant portion of your time.
- Your tools and materials will clutter up available space, increasing your frustrations.
- Also, DIY jobs tend to increase the amount of dirt you track within your home.
- There is a massive possibility of seriously messing things up.
- There is no insurance liability to pay for expensive mistakes in case things go critically wrong.
FAQ's
Yes, you can. The best way to properly sand between coats of drywall mud is to wait until the first coat is completely dry. Then apply two extra coats of mud and sand both coats to remove the bumps of drywall mud that prevents your knife from applying a smooth layer of drywall finish.
No, professionals don’t recommend overlapping drywall tape. Instead, use a flexible knife to distribute mud evenly over the joints. A single layer of tape reduces any chances of swelling in a finished wall.