Wall and ceiling corners are the weakest links in a drywall installation. And they are often the first spots in your house to develop stress cracks. This guide provides you with a practical guide on the causes of drywall corner cracks and how you can fix and prevent them.
You can perform a quick DIY repair of cracked drywall corners with joint compound, some drywall tape, and sanding with 80-grit sandpaper to smoothen the rough edges.
However, hiring a professional near you guarantees the best results and offers a long-lasting fix to cracked drywall corners.
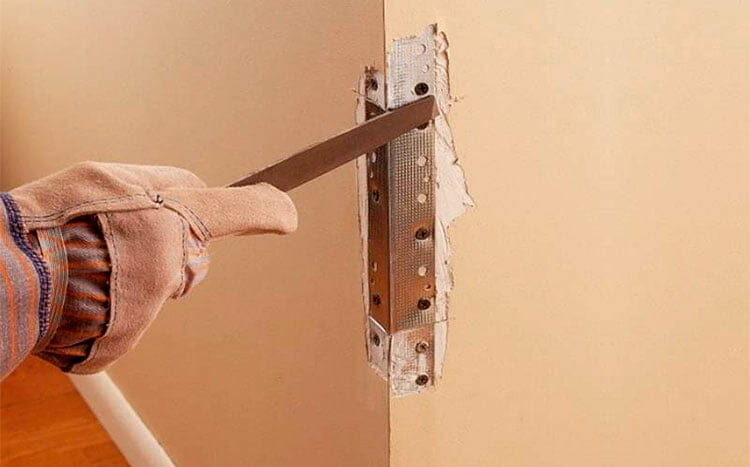
Causes of drywall corners cracking?
Drywall corner cracking can occur at almost any spot along the edges and inner wall. Common areas include exterior and interior windows and door corners, inner wall corners, and wall opening corners. Fortunately, most drywall corner cracks are superficial. Meaning they do not threaten the structural integrity of the entire wall.
Causes of drywall cracks include:
- Building foundation settlement.
- Differential frost heaving of the house foundation due to freezing weather and high soil liquidity.
- Mistakes made during drywall installation include inadequate support, excessive cutting with drywall knife at corner openings, and incorrect joint finishing.
- Failed drywall corner beads.
- Severe expansion and contraction of the building timber frames due to changes in outside temperatures.
- Roof truss uplift.
- Stress caused by wind loads from storms.
- Inadequate craftsmanship or materials used when hanging drywall, e.g., insufficient mud or omission of tape, can result in hairline cracks along drywall corners.
- Vibrations from the resident’s footsteps.
Tools and material needed
DIY drywall corner crack repair requires the use of both standard and specialty tools that are available at your local hardware stores.
- Utility knife – a durable utility knife with strong interchangeable blades fitted with a screwed-down handle for better grip and strength is recommended for drywall crack repair.
- Drywall knives – specialized drywall knives come in 4,6,8, and 12-inch blades are inexpensive tools for drywall repair.
- Drywall paper tape: this is a tough paper tape commonly used for covering drywall seams. Drywall tapes are available in several lengths ranging from 50 to 200 feet long.
- Drywall mesh tape: this is a self-adhesive fiberglass tale that you can use to repair cracks and seam drywall joints.
- Drywall sandpaper: comes in a variety of grades ranging from 80/120/150-grit sandpaper. It is used for general-purpose sanding or to create smooth surface textures.
- Joint compound: is a paste-like substance that is prepared and used to fill cracks in drywall.
- Drywall joint knives: have wide blades designed to apply and spread joint compounds, also known as mud.
- Mud pan: the purpose of this essential tool is for carrying joint compounds.
- Paint scraper: is a flat metal blade with a handle used for removing paint from the drywall surface in preparation for priming and painting.
- Drywall primer: the role of drywall paint primer is to make the drywall surface adhere to the paint. Drywall primer contains properties that stick to an unfinished drywall surface and allows the paint to bond with drywall primer.
- Paint: a first coat of paint is required over a newly repaired drywall corner crack. Ensure that you get the paint that closely matches the color and texture of the existing drywall.
- PaintBrush or Roller: you will need a paintbrush or roller to apply paint over the drywall surface. A paintbrush is perfect for touching up narrow spots on the drywall, while you can use the roller for broader areas.
- Drywall nails: are used to fasten metal corner beads to the drywall edges.
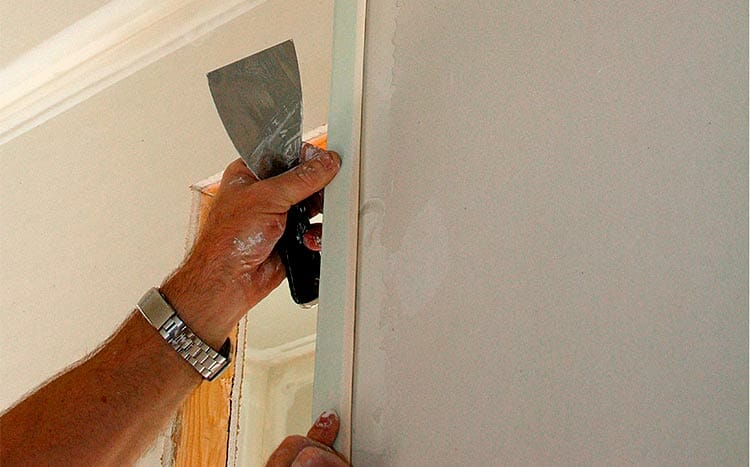
How to repair drywall corners?
Fixing a drywall corner crack is easy if you know what to do. Below is a step-by-step process that can guide you through the repair process.
Step 1
Preparation.
Clean the cracked area and remove all surface stains.
Remove all furniture, curtains, and other household items from the work area.
Assemble your tools and materials.
Step 2
Measure the crack and cut.
Use a measuring tape to estimate the length of the crack. (Measure an additional 1.5 inches if you are replacing a metal corner bead).
Use a pencil or utility knife to make a mark on opposite ends of the crack.
Draw a straight line through the crack from one end of each marking to the other.
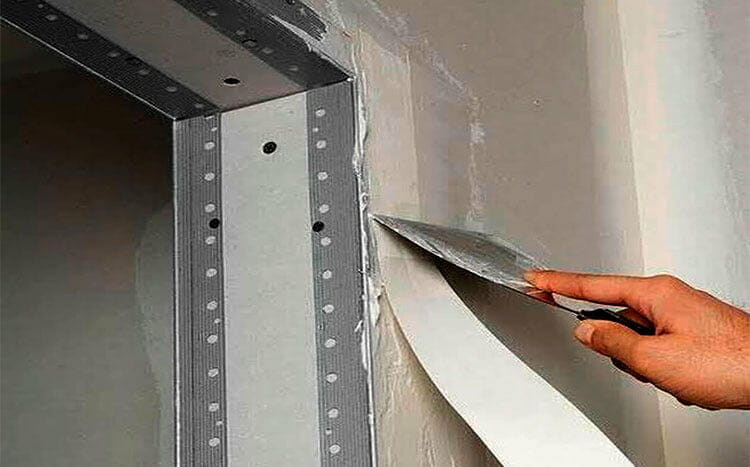
Use a paint scraper to loosen cracked or damaged tape. Lift and gently pull off the tape.
Use your putty knife to scrape mud off the cracked area. Dig down to the drywall metal corner bead.
Step 3
Remove the corner bead (only applicable when changing a damaged corner bead)
Check the metal corner bead for signs of damage and remove the existing corner bead if required.
If you notice cracks, remove the nails on the damaged area and cut them with a tin snip.
To remove damaged vinyl corner beads, use a putty knife to break the underside tape and cut with a utility knife.
Measure a new metal corner bead to fit the space where you removed the old one.
Cut, and install using nails or tape to fasten it in place.
Step 4
Prepare and apply joint compound.
Prepare joint compound (mud) in a tray with hot water and stir it into a mildly thick paste and ensure it is lump free.
Use a 4-inch drywall knife to spread the mud on the corner walls.
If you are using a fiberglass mesh tape, place the tape over the seam and spread another layer of joint compound over it.
Scrape it flat and allow it to dry for about 12 hours.
Step 5
Final coat and sand.
Wipe the seam with a slightly damp cloth or sponge to remove dirt and dust.
Apply a thin coat of drywall compound.
Apply a few layers of non-setting mud. Scrape each layer flat before applying the next.
Allow to dry for a couple of hours.
Sand with 80-grit sandpaper.
Step 6
Prime and paint.
Sand with 120-grit sandpaper to achieve a smooth surface.
Prime the area with drywall primer.
Paint to match existing wall paint.
How to stop drywall corners from cracking?
You can prevent the drywall corners in your home from cracking by adopting a combination of construction practices that consider the soil conditions, changes in weather, fluctuations in temperatures, and high-quality workmanship.
Here are a few tips on how to stop drywall corners from cracking.
- Use paper drywall tape in corners and ceiling/wall joints instead of mesh tape.
- Kiln-dried lumber is an excellent option for framing your home walls and ceilings. It has minimal moisture and retains its original shape over time.
- Plastic or vinyl corner beads are more durable than metal types in drywall installations.
- Only attach a joint side when fastening inside wall corners and between walls and ceilings while allowing the other to move freely.
FAQ’s
Can you caulk drywall corners?
No, it is a good idea to caulk drywall corners. Caulk on drywall typically appears as a patch that will not match the consistency of the drywall surface, even after you sand and paint it. However, you can caulk drywall corners in low-visibility areas like basements and closets.
How do you fix corners that separate from drywall?
You can perform a quick fix of corners that separate from drywall through the following process.
- Cover the crack between the drywall and the edge of the corner bead with mesh tape.
- Apply a layer of joint compound on the side of the corner bead with a joint knife.
- Leave to dry.
Should I be concerned about drywall cracks?
Not really. Drywall cracks are expected within the first year of house construction due to foundation and wood settling. Watch out for large cracks, which may signify a more serious problem. However, you can repair the small cracks with drywall tape and mud.
Do drywall cracks mean foundation problems?
No, not really. However, drywall cracks around windows and door corners can be attributed to foundation movement. Cracks that reappear after the repair are a tell-tale sign of shifting or settling foundation.
