Obtaining high rates of germination is crucial when overseeding your lawn; two fundamental techniques, aeration and dethatching, can aid in achieving exceptional growth rates, allowing you to enjoy a thriving and lush yard.
You can aerate and or dethatch your lawn before overseeding. Removing thatch allows the seed to make contact with the soil for better germination, while aeration ensures better air and nutrient penetration.
In most cases, lawn care and overseeding service may power-rake a lawn to remove excess thatch then aerate, before finally overseeding.
Difference between dethatching and aeration
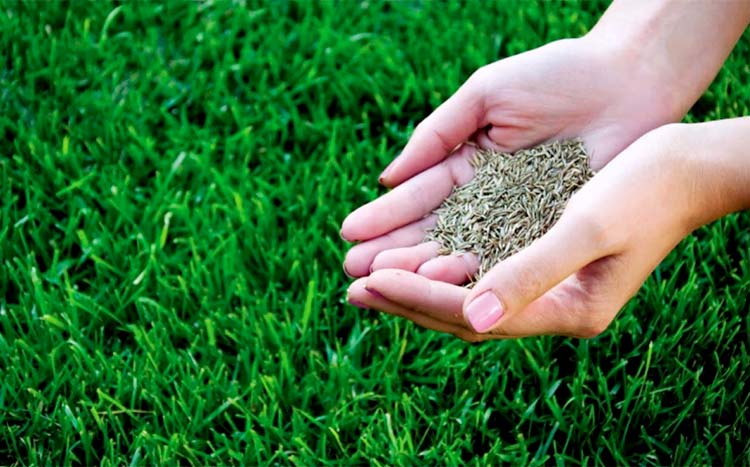
Dethatching and aeration are two lawn procedures that generate confusion among lawn keepers. On paper, both methods improve lawn health by providing the roots with better access to much-needed soil nutrients. Lawn keepers must learn to correctly identify the differences between both procedures before deciding which option is best for their lawn.
Detaching.
Dethatching is the removal of excess thatch from your lawn, leaving only the beneficial thatch layer. Thatch, a layer of interwoven dead and decomposing stems, rhizomes, roots, and debris lodged between grass blades and soil, offers significant lawn benefits when present in moderate quantities. However, a thick thatch layer can kill your turf.
Here are a few things to know about dethatching.
- Dethatching is highly invasive, and the procedure can cause significant damage to your lawn.
- A power rake is used for detaching. It removes thatch by using sharp blades to cut through the grass.
- Dethatching isn’t required unless the thatch layer exceeds ½ inch (1.25 cm) thickness.
- Confirm the thatch thickness before you dethatch your lawn. Otherwise, you could remove the beneficial layer of thatch.
- You can determine the thatch thickness by removing a wedge of your lawn and measure the thatch layer, which is visible in the cross-section of grass, thatch, roots, and soil.
- Fall and spring months are the best periods of the year to dethatch, depending on your grass type.
- You can detach either yearly or every couple of years, depending on your grass type.
- Symptoms that your lawn is due for dethatching include:
- Your lawn has a spongy or bouncy feel beneath your foot.
- Brown, dry spots appear on your lawn.
- Increased disease and pest issues.
- Increased vulnerability to heat or cold weather.
- Pooling, due to high water retention.
Aeration.
Lawn aeration is a lawn management procedure involving removing soil plugs from your compacted lawn surface. This loosens the soil and allows air, water, and nutrients to reach the root zone, allowing your lawn to rebound within a short period.
Here are a few things to know about lawn aeration.
- Lawns experiencing heavy foot traffic, parked vehicles, or where children and pets play must be aerated regularly.
- Aeration also helps with thatch removal and hastens its decomposition.
- Aeration is performed with a core aerator, a piece of equipment that removes small soil plugs as it moves across the lawn.
- Although you can hire a professional to aerate your lawn, adequate DIY aeration can be performed by renting aerating equipment.
- Early fall or spring are the best periods of the year to aerate, depending on your lawn grass.
- Aeration can be performed annually or every couple of years, depending on your lawn soil and grass type.
- Signs that you need to aerate your lawn include:
- Your lawn develops dull patches of thinning or worn-out grass.
- Your lawn dries out quickly after watering, indicating an inability to moisten.
- Your turf has stunted growth.
- Your lawn suddenly stops growing and dies in patches.
Use this FREE service
HomeGardenGuides.com is a free service that quickly matches you with top rated lawn professionals in your area.
You can get three estimates fast by real certified experts in your area in just 2 minutes.
- Scroll to the top of the page and enter your Zip code.
- Answer questions about your project.
- Your lawn project details are forwarded to three local experts. They will send you a price estimate for the job and some friendly advice.
IMPORTANT: There is no obligation to hire. This is a free tool and service to be used at your pleasure.

Can you overseed without aeration?
It is not mandatory to perform aeration before overseeding your lawn. Even though aeration breaks up compacted lawn soil and promotes improved growing conditions for grass seedlings, you may overseed without aerating if your lawn needs additional grass but does not exhibit symptoms of soil compaction.
However, it would help if you followed the crucial overseeding guidelines below to ensure high germination and growth rates that enable your turf to grow thicker and faster.
- Timing your overseeding to coincide with peak grass growing periods.
- Choosing the appropriate seed type for your lawn.
- Practicing post-seeding lawn care techniques.
Can you overseed without dethatching?
Although you can overseed without dethatching, your problem would be reduced soil-to-seed contact. Maintaining sufficient soil-to-seed contact when overseeding is key to achieving high germination rates. And an undisturbed layer of thatch – even a thin thatch layer may prevent this from happening.
Below are a few tips that guarantee improved seed-to-soil contact and high growth rates when overseeding without dethatching.
- Raking your lawn soil before overseeding.
- Overseeding after a few days of intermittent rain and continuous lawn watering after overseeding.
- Aerating your lawn before overseeding.
- Topdressing the topsoil with ¼ inch of fine compost before overseeding.
- Application of slow-release nitrogen fertilizers after overseeding to improve soil nutrition levels.
Do you need to dethatch if you aerate?
Unless your lawn has a massive thatch problem, aerating your lawn usually takes care of excessive thatch. Core aeration removes sections of thatch along with soil plugs. Plus, it promotes the growth of millions of microbial agents that decompose thatch. However, if your lawn is struggling to grow as a result of excessive thatch, or your lawn grass type produces thatch in vigorous amounts, then you may want to dethatch your lawn after aerating to boost turf growth.
Do you need to aerate after dethatching?
If your lawn has serious compaction issues, then you will need to aerate, even after dethatching your yard. Dethatching only addresses the problem of excessive thatch. Aeration, on the other hand, reduces thatch and improves the health of dying and thinning lawns by supplying more significant quantities of air, water, and nutrients to the soil where roots can access them.
Aeration after dethatching is essential under the following conditions:
- If you have heavily compacted lawn soil.
- If you have just overseeded a heavily trafficked lawn.
- If you have just detached a lawn with large patches of bare and dying turf.
What is the best time to aerate and overseed?
The best time to aerate your lawn is fall and late spring through early summer, followed immediately by overseeding to give seedlings a better chance to nestle and sprout inside the holes made by aerators.
Cool-season grass – Cool season lawns should be aerated from mid to late September to early November. This is their active root growth period when they regrow the damage caused by summer stress. Overseed with 48 hours after aerating, followed by watering and fertilizing to thicken your lawn effectively.
Warm-season grass – Lawns with warm-season grass should be aerated between late fall through mid-summer to help the grass to recover from dormancy fully. Although not all warm-season grass types require overseeding, you can follow up with overseeding immediately after aeration if needed.
Note: do not use fertilizer containing weed inhibiting herbicides because they prevent grass seedlings from germination.
How to prepare a lawn for overseeding.
Preparing your lawn to receive new grass seedlings is a prerequisite before overseeding. Below are the steps involved in the preparation process:
Step 1: Mow the grass.
- Maintain a low mowing height of 1 – 1 ½ inch (2.54 to 3.81 cm) to create suitable growing conditions for freshly overseed grass. Remove all grass clippings from your lawn when you are done.
Step 2: Perform a soil pH test.
- Administer a soil test to your lawn to determine its pH and to identify missing vital nutrients.
- Healthy soil should have a pH level between 6.0 and 6.8, depending on your soil type and environmental conditions.
- You can purchase a DIY soil test kit at hardware stores or hire a professional to conduct a pH test.
- If required, perform lime treatment on your lawn to bring the soil back to normal pH levels.
Step 3: Rake the lawn and remove weeds.
- Rake your lawn thoroughly to soften the topsoil and achieve higher germination rates.
- Apply herbicides to your lawn two weeks before you overseed.
- Avoid herbicides that prevent grass seeds from sprouting.
Step 3: Top-dress your lawn.
- Top-dress your lawn with a slim layer of compost to add extra nutrients.
- Apply the compost over your lawn and take care to keep the compost beneath the grass surface. Use a thatch rake for more effectiveness.
- A premixed blend of compost and enriched soil can be purchased at home improvement stores.
FAQ's
How long after overseeding can I mow?
Mowing too soon prevents your turf from properly establishing itself.
Wait two to four weeks for the newly seeded grass to absorb nutrients needed to develop roots before they are mowed.
Should I water before overseeding?
A thorough watering softens the ground allowing overseed to have better soil penetration. However, ensure that the earth is not saturated. The best plan is to water your lawn the night before you overseed, which gives the soil some time to dry.
Can you use too much grass seed?
Overseed with the appropriate amount of seed required. Avoid cutting corners, or you could end up with a bare and thinning lawn. Overseeding too much grass will leave your turf struggling for water and nutrients.


