Once you install drywall, you should decide the level of finish you want, depending on your budget and preference. Skim coating is usually level five of drywall finishing, and it involves applying a thin layer of joint compound. Skim coat conceals imperfections and creates a smooth, uniform surface ready for texturing or painting.
The average cost to skim coat drywall is $0.98 per sq. ft. (materials and labor). The range is typically between $0.90 and $1.07 depending on the level of finish and number of coats. For a typical 500 square foot project, expect to pay about $492, ranging from $450 to $533.
The project’s actual price depends on the job size, finish options, conditions, and location. Whether you are DIYing the project or hiring a pro, you must ensure the results are appealing.
| Cost To Skim Coat | |||
|---|---|---|---|
| QTY | Low | High | |
| Cost to skim coat | Per sq. ft. | $1.10 | $1.30 |
| 2 layer skim coat cost | Per sq. ft. | $2 | $3 |
| Cost to skim coat a room | 10 x 12 | $132 | $156 |
| Labor cost to skim coat | 1 Hour | $50 | $100 |
| Skim coat supplies cost | Per room | $60 | $150 |
| Cost to skim coat 2 rooms | 2 rooms | $264 | $312 |
| Cost to skim coat 3 rooms | 3 rooms | $396 | $468 |
| Skim coat standard 1,500 sq. ft. house | 1,500 sq. ft. | $1,500 | $2,000 |
Cost to skim coat drywall per foot
On average, it costs about $1.2 per square foot to skim coat drywall, with a typical range of $1.10 to $1.30 per square foot. The project’s overall cost depends on the size of the home, location, condition of the house, and the finish options you choose. Skim coating is done to create smooth and uniform surfaces. So, you should ensure the professional you want to hire is experienced in the job.
Skim coat labor cost
The labor cost to skim coat averages at $50 to $100 per hour. The project involves prepping the surface, sanding, mixing, and applying a joint compound. It can take about 4 to 6 hours to complete a 500 square foot project at the cost of approximately $200 to $400.
Different professionals charge differently, so you should get different quotes from at least three to five experts to compare the rates and determine the correct price range of the job. You can also DIY the project, but it may take longer due to a lack of expertise.
Cost to skim coat drywall for 2 layers
The cost to skim coat drywall for two layers is about $2 to $3 per square foot, with an average of $2.5 per square foot. Applying two layers of the skim coat is essential for making the surface smooth, even, and consistent. As a rule of thumb, you should always use at least two layers of skim coat to make the walls perfect and appealing.
Cost to skim coat a room
Typically, it costs about $130 to $150 to skim coat a 10 x 12 room of 120 square feet. A 12 x 12 room of 144 square feet may cost about $160 to $200 to skim coat. Usually, skim coating a larger surface costs less on average than a smaller space. So, if you plan to skim coat your home, it is best to do it all at once because you will get a better price for the project than working on one room at a time.
Cost to skim coat 2 rooms
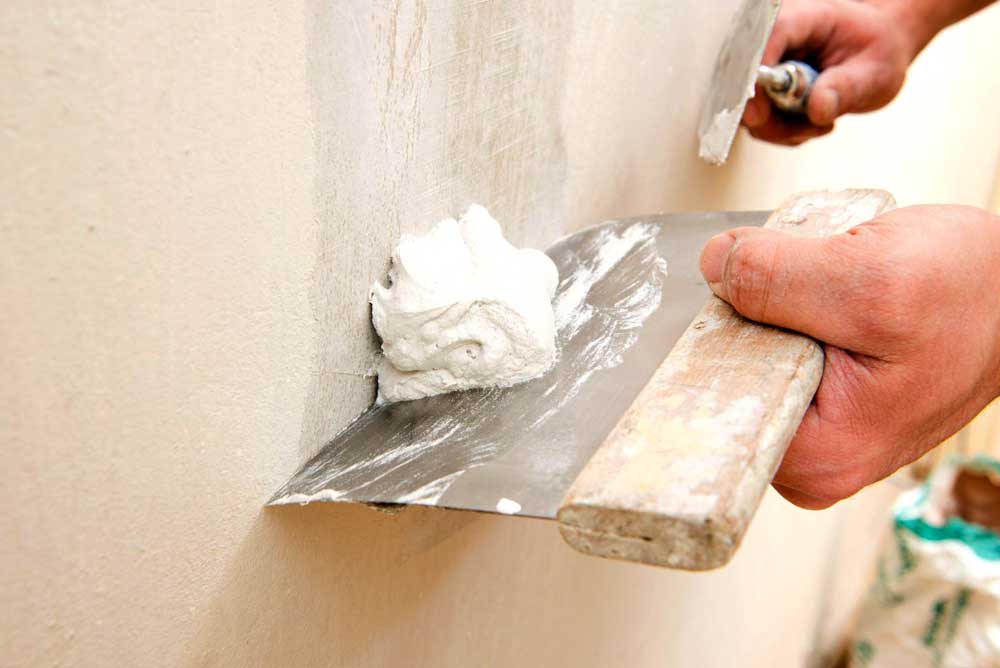
Skim coating two rooms costs approximately $260 to $320. However, this cost may vary depending on the complexity of the project, location, and the size of the rooms. To get a better price for the job, it is always best to skim coat a larger space than a smaller one. This is because the average price becomes lower for a bigger project than a smaller one.
Cost to skim coat the average 1,500 sq. ft. house
It costs an average of $1,500 to $2,000 to skim coat a 1,500 square foot house. The job’s actual price depends on the complexity of the job, location, and cost and level of drywall finish. DIYing this project is possible, but it will take longer. For faster and better results, you should hire experienced professionals to skim coat the house.
DIY vs. Professional
If you have not decided whether you should DIY the project or hire a professional, below are the pros and cons of each to help you make a sound decision.
Do It Yourself
Skim coating is relatively easy, and you can comfortably DIY the project without a lot of challenges. You will, however, need several tools for the job, including joint compound, painter’s tape, gloves, shoe covers, putty knife, trowel, and sanding pad, among others.
Although you will spend some money to buy the required materials, the project’s overall cost will be much lower than hiring a professional for the job. Check out the pros and cons of DIY skim coating.
Pros
- DIY skim coating is inherently cheaper, so you will be able to save some money. This is because the labor cost will not be included, which is usually the larger part of the overall project cost.
- You will have total control of the outcome, and you can decide whether to apply one or three layers.
- Completing a project gives you fulfillment and satisfaction, however small. You will have more self-confidence and sharpen your skills.
- DIYing is fun and enjoyable as long as you know what you are doing.
Cons
- Although you may have done a similar job before, you may lack a professional contractor’s skills. DIY projects are prone to accidents because most homeowners do not have the skills to complete the job professionally.
- Professionals come with their materials. So, for a DIY project you will have to buy all the necessary materials. This may be hectic, especially if you have no idea of the exact materials you need to buy.
- DIY may take longer than because you may lack enough time to work on the project if you have a busy work schedule.
- If you are a first-timer, DIY may be stressful because you may struggle to balance between your job, social life, and the project.
Professional Drywall Finisher
Skim coating is worth it, even though hiring a professional will cost you more. Professionals are trained and experienced for the job. So you will have peace of mind knowing your work is in good hands. The main advantages and disadvantages of hiring pros are listed below.
Pros
- When you hire a pro, you will get expert advice on the best way to handle the project and the best paint to use if you decide to paint after skim coating.
- Pros can handle the work within a short time, which means you will be done with the project within a day or two.
- Professional contractors follow the safety regulations of the industry. So, there will be little or no accidents/damages.
- Projects done by pros have a professional look and are usually very appealing. This may not be possible with DIY projects because of lack of experience.
Cons
- Hiring a pro is costly because labor costs usually cost about 2/3 of the entire project. This may be stressful if you do not have enough money for the job.
- Although contractors have the skills and experience, they may not visualize exactly how you want the results. More so, you will not have control over the project.
Process of skim coating
If you plan to DIY skim coating, it is necessary to know the steps involved. Even if you hire a pro to do the work, it is essential to understand what is going on to avoid being taken advantage of by cunning professionals. Below is an outline of the skim coating process.
Step 1: Prepping the surface
The first step is prepping the surface if you are not remodeling or dealing with new construction. Prepping involves applying a layer of high-quality primer before applying the skim coat. If the walls are damaged, have holes, cracks, or ripped wallpaper, you need to repair them using a joint compound before applying the primer.
Ensure you patch all the holes and cracks, then smooth the walls before applying the drywall primer. Not all primers are used on drywall, so ensure you have the right primer. New walls may not need patching and filling, so your contractor can sand and apply the primer directly.
Step 2: Apply all-purpose primer
Once the primer dries, the contractor will apply a layer of all-purpose joint compound. The professional works in small sections and smooths out the mud before it dries up. The mud is slightly thinned out and applied using a heavy-nap roller. The joint compound is usually applied evenly on the wall or ceiling, and it should be smooth and even.
Step 3: Smoothing
The joint compound is smoothed out further using a strong squeegee knife. The contractor starts at the top of the wall and smooths one section at a time to make the work easier and neater. The professional will overlap each vertical pass to make sure the surface is even.
After that, the mud is dried and checked whether any uneven sections are remaining. If any, the surfaces are sanded to remove the mud lumps or lines. A second coat of joint compound can be applied if necessary.
Step 4: Applying more layers
Usually, skim coating requires at least two layers of thin joint compound. The second or third layer is applied if there are any imperfections or damages. Since the compound dries very fast, the contractor can apply additional layers within a short time. Once the application is complete, the professional will sand the walls or ceilings using 100 or 120-grit sandpaper.
Once the skim coat is completely dry, you can texture or paint the walls. However, the joint compound is highly porous, and it may show through the paint. For this reason, it is necessary to prime the walls first before painting.
The primer acts as an adhesive and helps the paint to adhere stronger and better to the surface. Also, it makes the surface uniform and reduces the number of coat paints you will use on the wall.
How long does skim coat take to dry?
Skim coat dries very fast, and it can take between 30 minutes to one hour to dry fully. After this period, you can sand the walls and ready them for painting or texturing. However, it is advisable to give the skim coat about three days to dry completely before painting the surface.
If you paint on the skim coat before it is fully dry, the coat may start peeling or cracking soon after, giving you a ton of problems.
Do I need to skim coat, or can I just prime drywall directly?
A skim coat or level 5 drywall finish is used to level a flat surface to make it uniform for texturing or painting. As much as you would like to skip this step to save some money, it is necessary to skim coat before priming for the best results.
If you want to fill holes and cracks before painting your walls, a skim coat is a great way to do that. It is a quick and long-term solution to holes, cracks and leveling flat surfaces before painting or texturing.
FAQ’s
Do you need to prime walls before skim coating?
Yes, you will need to prime the walls before you skim coat to promote better adhesion between the wall and the joint compound. It is important to prime the entire surface instead of spot priming to get an even finish.
Can you paint over a skim coat?
Yes, you can paint over a skim coat. However, the material is highly porous and will soak up a lot of paint. To reduce the amount of paint needed for the job and prevent the mud from showing through, it is essential to prime the surface first. Use a quality primer to seal the porous skim coat to make the paint adhere better to the surface. Make sure the skim coat is completely dry before you prime and paint the walls.
Can you DIY, or should it be done by a professional?
Yes, you can DIY your skim coat project and save a lot of money instead of hiring a professional to do the job for you. However, you will need to buy all the necessary tools for the job and have basic skills to handle the job. If you doubt your skills, it is best to work with pros to ensure you get excellent results.
Although most people still skip skim coating, it is necessary, especially in visible areas like the living room, kitchen, and even bedrooms. More so, skim coating your walls and ceilings makes them look beautiful and appealing. So, for an aesthetically appealing home, you should consider to skim coat before painting or texturing.


