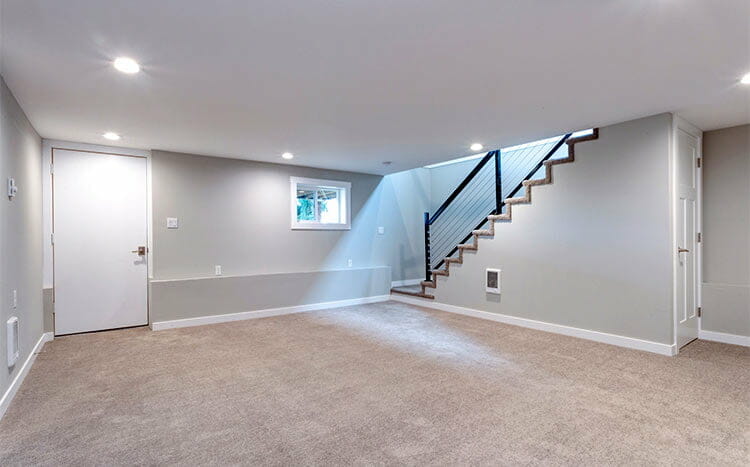


Completing your basement remodel might not be as straightforward as it appears, demanding a specific skill set for its successful execution.
Numerous obstructions such as heating ducts to gas lines to plumbing drains, water pipes need to be worked with, as well as the real threat of rising damp and black mold. You can’t afford to make mistakes on this job as they will come back to bite you later.
To help you get it right, here’s a guide on how to successfully complete the job as well as some pointers on the mistakes to avoid. We also cover some tips on how to save if you’re working on a budget.

What we cover
ToggleMistakes to avoid when finishing your basement walls
While it’s possible to finish your basement walls as a DIY, there are several critical mistakes that may make your job very costly. Here are some of the things to watch out for:
Overlooking moisture issues
We understand that you’re in a hurry to get a finished basement. However, that’s no excuse to overlook that water seepage, leaks, or cracks on your walls and ceiling. If left unattended, the small water problem will soon escalate to damaging your drywall as well as attracting mold and mildew.
The best thing you could do is to hold a basement inspection before commencing the project. Look out for stains, cracks, water leaks, or damp walls.
If the problem is condensation, you can rent out a dehumidifier to get rid of the excess moisture.
Using the wrong materials
The materials you choose for the basement walls will be crucial in determining how well your walls handle moisture.
For instance; using materials like plastic sheets instead of metal studs for the framing isn’t a good idea since plastic sheets tend to trap moisture easily.
For the insulation, using fiberglass over concrete may also be a bad option since it’s prone to mold infestation when exposed to moisture. Instead, an insulation material like XPS foam board or a closed-cell spray foam would work better.
If you don’t know which material is better for your basement wall, it’s best to consult a contractor.
Poor designs and floor layout
While a basement offers you more room to work with, a poor design or a bad floor layout can make it feel smaller than it is.
You, therefore, need to ensure you know exactly which kind of space you want for the basement and if possible, consult with a designer to find out if it’s the best layout for that level.
Blocking access to equipment
In a bid to create more space, many homeowners tend to forget that basements house most of the home’s utility equipment. This creates problems when trying to access them.
When finishing the wall, ensure you leave space to access your plumbing unit, electrical box, hot water heater, and even the sump pump. Keep them in a well-lit area with good ventilation and around 2 – 3 feet of space to make repairs easier.
Tips to save when finishing a basement wall
When working on your basement as a DIY, you stand to save thousands of dollars if you know what you’re doing. Here are a few tips to help you save that extra dollar:
Go for drywall over paneling
Drywall is a cheaper long-term finishing alternative to paneling because it has fewer labor requirements, it’s easier to repair, and has better soundproofing characteristics.
Paint the basement wall
If you tend to use your basement frequently, painting is a great and cheap way to finish it. Just ensure that the wall surface is waterproof and in good shape. The best thing about painting is that you have the freedom to make the designs you want.
Increase your wall spacing
Most of the modern foundation wall framings don’t have to support the loads from above. This means that your frames only accommodate support structures like the drywall, wirings, and trims.
Therefore, by increasing the spacing between the walls, you’ll use fewer wall studs and thus cut down your costs.
Waterproof the basement
Keeping your basement dry will save you thousands of dollars in future repairs against water leaks, mold infestations, and other moisture problems. You can do this by installing a sump pump, or sealing the walls using plastic or other types of sealants.
If you already have water problems, get a contractor to repair the issues before proceeding with the renovations.
Check the local building codes
Most of the basement wall, ceiling, and flooring renovation jobs require a permit and inspection from the local building council. Failure to get the permit may result in the tearing down of your installations which ends up being very costly.
To avoid this, ensure you get your permits on time before the remodeling. You should also check your homeowner association’s guidelines to avoid violating any of their rules.
Looking for a basement contractor?
Try our FREE service! HomeGardenGuides.com is the fastest and easiest way to get three quotes for your basement finishing job from the best and most affordable contractors near you.
The service quickly matches you with the 3 basement specialists voted #1 by previous users in your area. All you have to do is:
- Scroll up to the top of the page and enter your ZIP Code in the blue form.
- Give us a few details about your basement finishing job, plus some contact information.
- We will then forward your job details to the closest three basement contractors, all voted best-priced in your area, who will price your job.
IMPORTANT: There is no obligation to hire any of the contractors. This is a free tool and service to be used at your pleasure.

How to finish basement walls
Your first step to finishing your basement walls should always be getting a permit for the job. In most counties, the local government requires the residents to apply for a building permit for most home renovation jobs.
And while you can complete the finishing without a permit, this decision may come back and haunt you when you’re looking to sell the house.
To apply for a permit, visit your local government’s website, or make a visit to your local planning and building department.
Step 1: Gather your tools and materials
Once your permit situation is resolved, the next step is gathering the materials, tools, and supplies for the job. Here’s what you’ll need:
- Caulk gun
- Protective gear
- Foam Insulation adhesive
- Circular saw
- Utility knife
- Masonry drill and bits
- Nail gun
- Hammer
- Tape measure
- Insulation tape
- Trowel
- Spray bottle
- Drywall sheets
- 1 x 3-inch board
- Drywall screws (1.625 and 4 inches)
Step 2: Prepare the walls
Prep work is always key when planning to finish your basement. First check the walls for any moisture issues including leaking pipes, condensation build-up, and faulty windows.
If any, use your dehumidifier or a sump pump to get rid of the moisture. If the foundation walls feel wet or if you notice water trickling from the walls, the problem could be bigger. You may need to hire a professional drywall contractor to fix the issue.
Any holes and cracks on the walls, ceilings, or window frames should also be repaired first before beginning the finishing process. You can also apply a waterproof masonry sealer to protect the walls. Let it dry for at least 4 hours before moving to the next step.
Step 3: Install the insulation
Once the walls are dry, take the tape measure and measure the dimensions of your walls (length, width, height) and note it down. Next;
- Use your utility knife and cut the insulation to your measured length. Ensure it accommodates any obstructions.
- Apply the foam adhesive to the insulation’s back according to the manufacturer’s instructions.
- Press your insulation sheets onto the walls until it sticks. Hold it in place for at least 2 minutes or as recommended on the adhesive can.
- Use your insulation tape to cover any cracks or seams in between the insulation sheets. You may also opt to fill the seams with caulk.
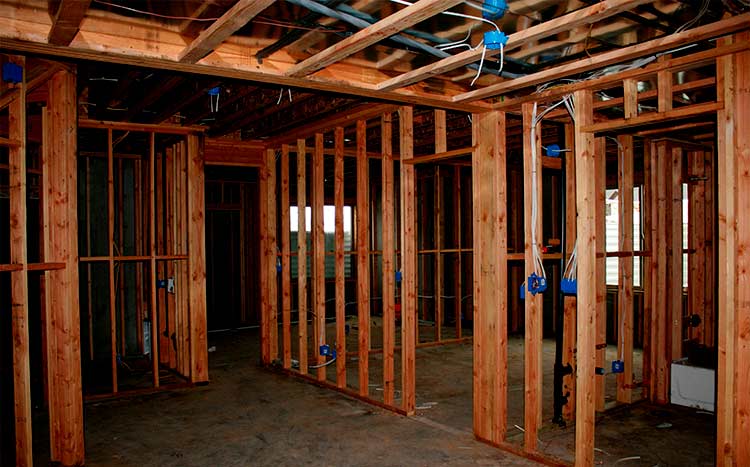
Step 4: Frame the walls
This is one of the most time-consuming tasks of the job. Here’s how to do it:
- Using a tape measure, measure and mark 3 inches from the wall’s top and bottom. Use two marks to ensure you have 4 marks on each wall that show where you’ll place your planks.
- Now draw a straight line joining the marks. You can hold a lever horizontally against the insulation to draw. You should also have two horizontal lines on each wall.
- Now draw a horizontal line at the center of your top and bottom marks i.e., at the halfway mark of the distance between the marks.
- Next, subdivide your two halves further by drawing two other horizontal lines at their centers such that you have 5 equally spaced lines.
- Take your 1×3 inch board and line it up with the bottom-most line you drew and hold it to place. Next, use your masonry drill and bit to drill 5-inch deep pilot holes onto your board every 16 – 20 inches.
- Hammer your drywall nails or spring spikes into the pilot holes until your board is completely secured to the wall.
- Repeat steps 5 & 6 onto the other lines you’ve drawn on the wall. In the end, you should have 5 horizontal boards running across your wall.
- Now draw a vertical line at the center of each wall and set your vertical framing as you did the horizontal ones. This will act as the center vertical framing.
- Measure 16 inches from the center vertical framing then screw the boards vertically over the horizontal boards. Do this until you have the boards covering both the length and height of your walls.
Step 5: Applying the drywall
Before closing up the framing, install any utility lines that should run inside the walls e.g., plumbing, HVAC, or electric cables. Ensure you get a professional to handle this part.
Then finally, it’s time to apply the drywall. First, you’ll have to determine if you’ll hang the drywall horizontally or vertically. Next, measure the drywall to ensure it’ll fit your foundation walls. Then:
- Cut out the drywall leaving out the sections of utilities that would need to be exposed.
- Secure the drywall sheets to the wall studs using the drywall screws. You can also use glue or drywall adhesive to cover the vertical studs.
- Fill in any seams or cracks then apply drywall tape over them. Next, cover the screw heads with drywall mud.
- Do this for all the remaining walls.
Step 6: Add wallpaper or Paint (Optional)
If you’d like to add some style and color to your basement, you can opt to add wallpaper over the walls. Ensure you use adequate adhesive over the drywall to ensure the wallpaper sticks.
If you don’t want the wallpaper, you can also opt to paint the drywall. Choose a bright and neutral color then use a paint roller or brush to paint over the wall surface.
FAQ's
The average cost to finish your basement wall generally costs anywhere from $7.50 – $25 per sq. ft depending on its condition, your location, and choice of materials.
On average, this becomes around $24,375 for a 1,500 sq. ft basement. The costs may however be cheaper if you choose to DIY.
It depends. Vapor barriers can help keep moisture out of your basement, however, if the walls are designed to dry from the interior, the vapor barriers become a bad idea.
Vapor barriers are generally required in areas with a colder climate but are often unnecessary in warmer weather.
Yes! Sealing and waterproofing your basement walls before finishing protects the basement from mold infestations and unexpected water problems. Waterproofing the basement is also known to help increase the overall resale value of your home.