People’s choices for wall finishes vary significantly. Some individuals favor a textured look for their walls, whereas others lean towards a smooth and flawless surface. If you’re someone who prefers smooth walls, the primary obstacle you’ll face is removing the texture from your walls.
Fortunately, there are multiple ways to smoothen textured walls. All you’ll need is to ensure you know the appropriate techniques to complete the job.
If you plan to do it as a DIY, be prepared for a messy and tiresome task ahead. The best way to achieve good results when removing texture from walls is by hiring a professional paint stripping service.
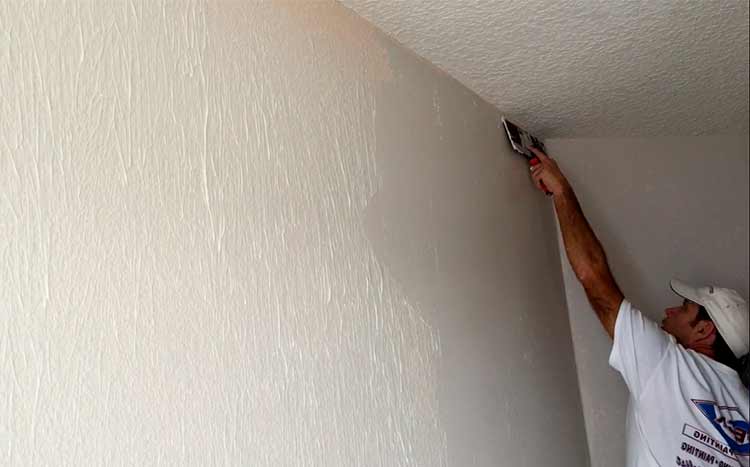
What we cover
ToggleWhat are textured walls?
Textured walls refer to a wall surface finishing applied mostly to hide any imperfections and flaws. It has been in the market for more than half a century with many rental and commercial buildings using it to this day.
A big reason why many homeowners texture their walls is that it’s cheap, very durable, and is hardly affected by wear and tear. Others also feel that texturing adds more character and life to the walls.
However, textured walls are becoming less popular by the day with more people deeming them as an outdated design.
Popular methods to remove texture from walls (step by step)
With texture removal, most homeowners have four main options to consider. The two most popular removal techniques include soaking and scraping the texture off, or the application of a skim coat.
Each of these techniques is applicable depending on the condition of your walls as explained below.
Soak and scrape the texture off
The soak and scrape method is used on textured walls that are yet to be painted. This is because the finishing will easily absorb water making it easier to scrape.
Tools and Materials needed
- All-purpose joint compound
- Protective equipment
- Drop cloth
- Painter’s tape
- Painter’s tray
- Regular pole sander and pole attachment
- 120 grit sand screen
- Sanding pad or block
- Spray bottle with water
- Magic trowel
- Small and large taping knife
Step 1: Do the Prep work
As with any other home renovation project, prep work is one of the most important steps of the job. Since removing wall texture can be very messy, first cover any furniture and other fixed objects in the room.
If possible, tape the air vents to prevent dust from spreading to other rooms. Next, lay the drop cloths on the floor, and tape off the trims and baseboards using painter’s tape.
Note: Ensure you’ve put on your protective apparel including your eye goggles, face mask, gloves, and overall before starting this work.
Step 2: Soak your wall
Scraping a dry wall surface can be a tedious task. You’ll, therefore, need to soak the wall surface with some water to make it softer. This is usually necessary wherever the walls were painted.
So, take your spray bottle and start by spraying and coating smaller areas with water then give it some minutes to dry. Do this repeatedly (depending on your surface) until the wall surface feels soft to the touch.
Step 3: Start scraping the wall
Now take your large taping knife and use the stepladder to reach the farthest corner of the wall. Start scraping the surface with the knife at a 30-degree angle and keep adjusting as you scrape down. Use the smaller taping knife.
A good habit is to keep cleaning the wall surface as you scrape downwards. If you meet some resistance, try scraping harder, or soak that part for a few minutes then continue the process.
Do this until you’ve removed all the wall texture. It’s okay if you notice any thin smears left on the wall. They will be sanded down in the next step.
Be careful not to damage the wall surface beneath that texture.
Once you’re done, let the surface dry for at least 24 hours before moving to the next step.
Step 4: Sand down the wall
Once the surface is dry, sanding down is crucial to achieving a smooth finish. Take your 120-grit sanding screen or sandpaper and sand down any rough patches and smears left on the surface.
Avoid exerting too much force when sanding to ensure you protect the wallboard. Some pros also recommend using work lights when sanding down to smoothen even the tiniest of rough spots on the wall surface.
Finally, take a damp cloth and wipe out any remaining dust on the wall.
Step 5: Do the finishing
If you’ve noticed any small holes, dents, or scratches, you can use your all-purpose drywall compound to fill them. Subsequently, let the compound dry then sand the wall and the patches until they achieve that smooth finish you want.
Pro tips when soaking and scraping
- When making any drywall repairs on the wall surface, avoid using very thick drywall compounds. Doing so only increases the sanding requirements.
- When sanding down your walls, run your fingers across the wall surface to find any imperfections or unevenness that might not be visible before painting.
- When choosing a sanding pad, always go for the widest one. It will cover more area and help you achieve a smooth surface quickly.
- Always use a bright light or flashlight after sanding to see if the surface wall looks smooth.
Applying the skim coat
When working with a painted textured wall, the soaking and scraping method can’t work. This is because the color in paint usually acts as a sealant preventing water from softening the texture.
In this case, covering the surface with thin layers of joint compound or skim coating is a more effective alternative.
Nevertheless, skimming will take more time and it’s more labor-intensive making it better suited for professional DIYers or contractors. You’ll also need to be very patient if you’re to get a smooth finish.
Tools and Materials needed
- Tools and Materials needed
- Canvas drop cloth
- 6’ and 12’ taping knife
- Stepladder
- Sanding pole
- 3-inch painter’s tape
- Protective equipment
- All-purpose drywall compound / Drywall mud
- 120-grit sandpaper
- Drill and attachment
- Primer
- Large-nap paint roller
- Roller pan
- Wall cleaner
- Paddle bit
Step 1: Start with the wall prep work
First, put on your protective gear then dust off your wall and cover up your furniture and other items close to the wall. Lay the drop cloths around the site, and use the painter’s tape to seal off the trims, door, and window frames.
Tip: Avoid using plastic drop cloths as the surface may become very slippery.
Step 2: Scrape, clean, and sand the walls
To achieve a smooth finish through skim coating, you’ll first have to remove all the loose drywall pieces. Using the 6-inch taping knife, scrape your wall and remove all the loose pieces of drywall.
Next, use your cleaning products and water to wash the walls to ensure that wallpaper paste doesn’t show through your paint, then rinse it and let it dry.
Finally, gently sand down the wall to ensure that the glossy sheen on the surface paint is knocked off. This will improve the adherence of your drywall compound to the surface.
Once done, wipe down the wall using a damp rag to remove any dirt, dust, or debris that could be on the surface.
Step 3: Mix the drywall compound with water
When working as a DIY, you’ll want to use a gallon of the pre-mixed compound in a 5-gallon bucket then mix it with water a little at a time. Use a drill and attachment bit to mix the compound until it attains a smooth, lump-free, whip-cream consistency.
You can start doing this on small batches until you get the hang of it then move on to larger batches.
Step 4: Apply the compound
Now pour the compound mixture into your roller pan or mud pan, saturate the large-nap paint roller and start rolling it to your wall. This will be a very messy job since the roller will keep dripping.
An alternative to this would be using a putty knife instead if the wall to be covered isn’t too big. Ensure that your layer is heavy and thick enough such that the wall isn’t visible at all.
If you continue with the roller, make a point to use a putty knife to smoothen any large bumps on the wall surface.
Step 5: Maintain a wet edge
Note that since the compound tends to dry quickly, you’ll have to work in small sections, around 2 – 3 inches at a time or up to 4’ x 4’. But if some of the edges dry, you can use a spray bottle to spray water on the edges before troweling it smooth.
It may take you some time before you get the hand movement for this part, but for best results, you’ll need to do it without stopping for the entire wall.
Additionally, avoid dumping any excess compound on your knife or roller back to the bucket with freshly mixed compound. Get rid of any excesses and only use fresh drywall compound for the job.
Step 6: Leave the compound to dry
Finally, leave your walls to dry for between 24 – 48 hours or longer depending on the humidity of the room.
Keep in mind: You may notice that the first compound coat isn’t as smooth as you expected. For most inexperienced DIYers, even if you use a magic trowel, the wall surface still won’t be as smooth. The trowel may leave new lines on the wall surface.
To fix this, you might need to apply a second coat or finish coat.
Step 7: Apply the second/ finish coat (Optional)
Before applying this coat, use your medium grit sandpaper to lightly sand down the first coat. Next, apply the second coat of joint compound just like you did the first one.
Some experts, however, recommend that if you applied the first coat in a vertical direction, use a horizontal direction for the second one and vice versa.
Try and get this coat as smooth as possible, then use your large taping knife to go over the wall surface correcting every imperfection.
Step 8: Sand the wall smooth
The last step is to sand down the wall surface very gently in a circular motion to get it extra smooth. Instead of the sanding pad, use a medium grit sandpaper or sand sponge and finally wipe down the surface.
To find every unevenness, illuminate your walls using a bright light as you sand.
Pro tips when skim coating
- If you intend to paint the wall, always prime it first after applying the second coat.
- When working around edges and corners such as the areas where the ceiling meets the wall, you can use a 90-degree tool like the Drywall corner tool instead of the standard taping knife.
- If this is your first time skim coating, start with the hidden and less important walls first. Once you’ve improved your skill, you can then move on to other walls.
- Be careful when sanding and don’t exert too much pressure. Also, don’t use very harsh sandpaper grit as it may damage your wall surface.
Cover up the texture
Another alternative to removing wall texture is covering it up using another material. Wood, metal, stone, and brick are all popular options that can be used on interior walls and result in a beautiful appearance.
Some owners also go with shiplap or wainscoting options to cover up their textured walls.
However, if you have baseboards, you might need to remove them first and add over paneling down to the floor before adding another surface above it.
You may also have to move your electric switches, radiators, vents, and other outlets. This could turn out to be quite costly.
Live with it
Your last alternative is to embrace your orange peel textured walls and incorporate it with your room designs. The goal is to distract everyone’s attention from the wall to other things through the decor.
You can do this by adding more artwork and posters, reducing the room’s lighting or keeping it away from the wall, and opt for flat paints over the bright glossy ones.
With the right style, no one will even notice the texture on your walls.
Skim coating vs replacing the Drywall
Besides the alternatives mentioned above, replacing your drywall will also do the trick when removing texture. However, cost is the biggest factor when choosing between replacing and other popular options like skim coating.
If the texture on your walls is painted, thick and covers a large area, skim coating it becomes a really expensive option. This is because it’ll take more time, increasing labor costs, and will require more materials.
Skimming over a very thick wall also affects the trims which will require some adjustments and this can rake up your total costs.
In such a case, replacing the drywall on that affected area might be a cheaper and more effective solution.
DIY or hire a pro?
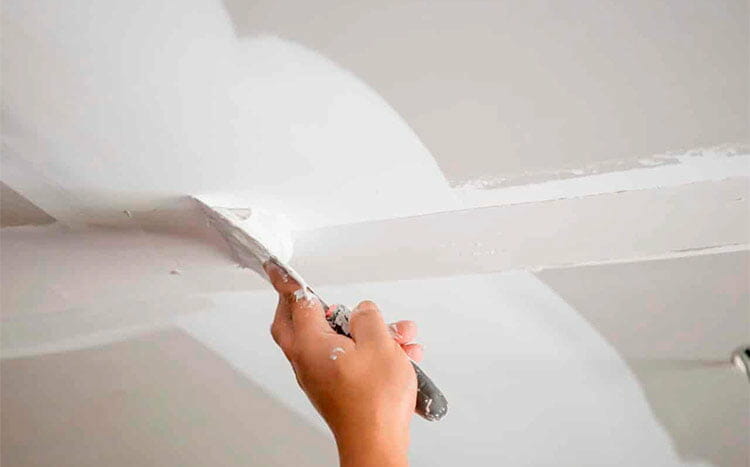
Whether you should hire a professional to remove your texture from walls or do it as a DIY project is all up to you. The job isn’t very hard to do, but it’s messy, tedious, and requires a lot of patience to get the best results.
In the end, it’ll come down to time vs money. With DIY, you stand to save a lot of money for the job, but at the risk of wasting time and ending up with a subpar quality job.
Hiring drywall contractor pros, on the other hand, is more expensive but guarantees you better quality and very smooth surfaces. They also have all the best tools for the job, meaning you don’t have to spend on equipment.
How much does it cost to smooth textured walls?
The average cost to skim coat your walls ranges between $0.95 – $1.15 per sq. ft depending on the condition and size of the walls. Materials and supplies will cost you around $0.30 – $0.40 per sq. ft and labor costs will set you back $0.65 – $0.85 per sq. ft.
FAQ's
Skim coating is quite a labor-intensive job that may take anywhere from 2 – 4 days to skim coat one average-sized room.
Yes! Skim coating over paint is possible and works. However, you’ll still need to consider the condition of the wall. Walls in good condition work best when skim coating over paint.
A level 5 wall finish is the highest/smoothest finish attainable. It has no texture, no bumps, no imperfections.
In most cases, no. While there are still some owners who prefer textured walls for hiding imperfections, most homebuyers don’t find it appealing.
This means the value of your house might be relatively lower when looking to resell. However, you can still achieve a modern look with textured walls with the help of a pro.


